
When nighttime temperatures regularly drop below 10 °C, the robotic mower has nothing left to do outside. Letting the device run on grass that no longer grows wears out the blades unnecessarily and puts a strain on the battery under unfavorable conditions. Preparing the robotic mower for winter storage takes an hour, no more, but each step is crucial to have a functional device come spring.
1. Update the firmware before cutting the power

See also : Optimize Your Career in Education: Essential Online Resources
We often think of cleaning first, but the very first action to take concerns the software. Several manufacturers release navigation or battery management patches at the end of the season. Applying the update before storage prevents finding a robot in spring that cannot restart due to outdated firmware.
Connect the robot to Wi-Fi, launch the manufacturer’s app, and check if a recent version is available. Once the update is installed, allow the robot to complete a full restart cycle before turning it off. There are good tips for winterizing the robotic mower that also emphasize this software point, which is often overlooked.
See also : Discover Your Unique Style: Fashion and Beauty Tips
2. Disable smart home access and remote controls

A robot connected to a voice assistant or integrated into a smart home scenario can receive a wake-up command in the middle of winter. The result: an unnecessary charging cycle, or even a start on frozen ground that damages the blades and the lawn.
Before storing the device, review the active integrations:
- Remove scheduled routines in apps (Alexa, Google Home, HomeKit) that mention the robot
- Revoke shared access on the manufacturer’s account if other users have access
- Disable the API or cloud mode in the robot’s app settings
This precaution of home cybersecurity applied to the garden is documented in the knowledge bases of connected brands like Mammotion or Segway, but it rarely appears in traditional winterization guides.
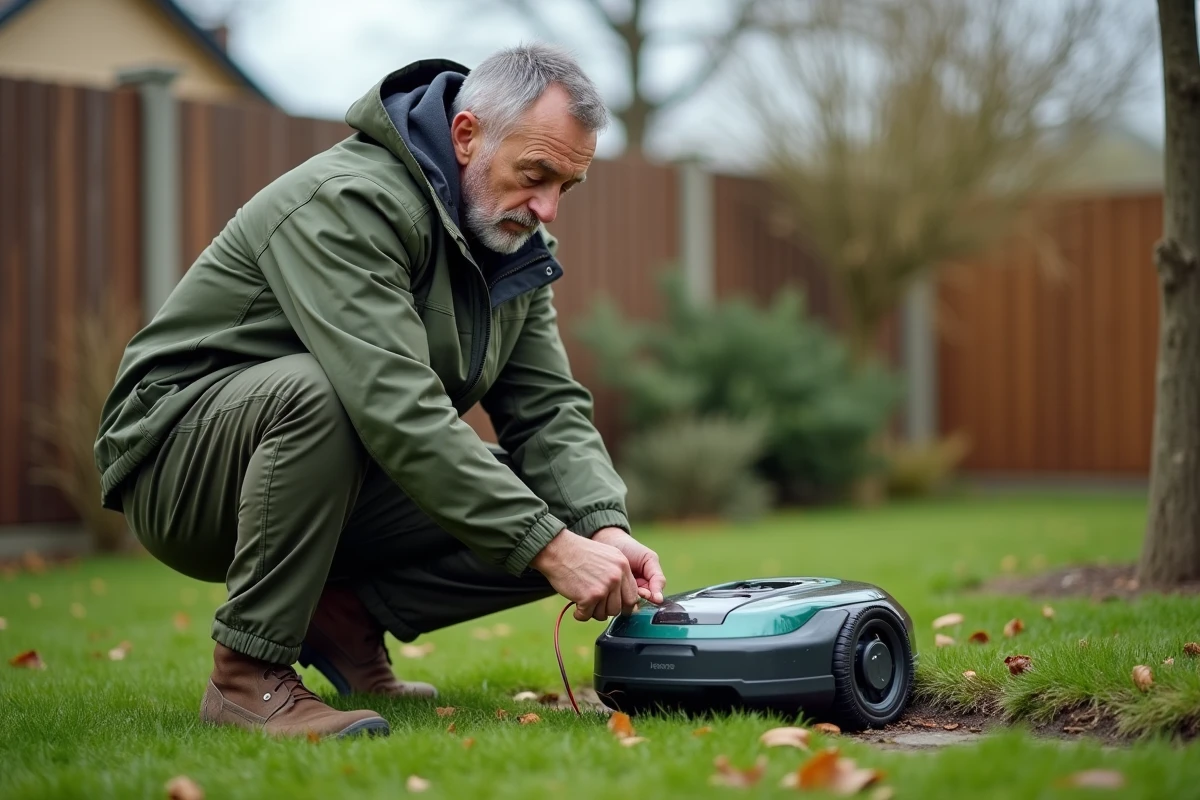
3. Clean the chassis and inspect the blades

Turn the robot over and remove any grass clippings stuck under the cover. A dry brush is sufficient for the chassis. For ingrained deposits around the blades, a damp cloth does the job without risking water getting into the electronics.
Examine each blade individually. A dull or bent blade should be replaced now, not in spring when stocks may be limited at retailers. Take the opportunity to check the condition of the mounting screws and wheels: a worn roller or a seized bearing is easier to spot on a clean device.
4. Prepare the battery at the correct charge level

The lithium-ion battery degrades faster when stored at full charge or completely empty for several months. The recommended storage range is between half and two-thirds of capacity.
Specifically, start a final charging cycle, then let the robot run for a few minutes to drop to the desired level. Storing the battery at partial charge preserves its lifespan over several seasons. If your model allows for battery removal, do so and store it separately in a dry place at room temperature.
5. Choose the right storage location for the robot

An unheated but frost-free garage is perfect. The robot should be kept away from direct moisture: not on the floor of a damp basement, not under a tarp outside. Ideally, it should be on a shelf or raised surface in a ventilated area.
Feedback varies on this point depending on the regions: in the south of France, a closed garden shed may suffice. In continental or mountainous areas, where temperatures drop significantly below zero, an indoor space with a stable temperature above 5 °C better protects the electronic components and the battery.
6. Manage the charging station and peripheral cable
The charging station does not need to remain plugged in all winter. Unplug it from the power source, clean the metal contacts with a dry cloth, and store it in the same place as the robot.
The peripheral cable (for wired models), on the other hand, can remain in the ground. Manufacturers confirm it: the cable withstands freeze-thaw cycles without degrading. Just mark its connection points to the station for easier reactivation in spring.
- Unplug the transformer and store it in a dry place
- Clean the terminals of the station with a cloth
- Leave the peripheral cable buried; it is not affected by the cold
7. Reset the RTK or GPS beacons before spring restart

Robots with RTK or wireless GPS guidance require special attention. After several months of inactivity, the RTK reference station may have shifted a few millimeters due to frost or soil settling. This shift is enough to distort the mapping of the terrain.
At the time of reactivation, recalibrate the reference station and restart a complete mapping rather than using the old map. This operation takes about twenty minutes and ensures precise mowing from the first passes. If your robot uses a standard peripheral wire, this step does not concern you.
A well-executed winterization depends as much on software as on hardware. The firmware update, disconnection from smart home systems, and battery charge level make the difference between a robot that starts on the first try and one that goes through customer service in spring.